Setting up on your computer
How to charge, fit, and use your MotionSleeve with KineticOS in a web browser — no app install needed.
Welcome. This guide walks you through using your MotionSleeve with KineticOS in a web browser — from opening the box through your last session. To use the phone app, see the iOS or Android guide. If you hit a snag, check the troubleshooting guide or email us at hello@openmotion.ai and we’ll help you out.
NOTE
Before you start
KineticOS in the browser only works in Google Chrome on a computer or laptop with Bluetooth. Chrome is the only browser that supports the Bluetooth connection to your MotionSleeve — no other browser will connect to your sleeve. Use the latest stable version of Chrome.
Step 1 — Charging the MotionSleeve
When you open the box, you should find:
- The MotionSleeve — an upper and lower sensor pack connected by a flexible elastic conductive strap, secured to your limb by two adjustable elastic compression wraps, like an ACE bandage.
- USB-C charging cable — one cable charges the entire sensor pack.
- Instructions for use — a printed quick-start card with the basics and a link back to this page.
Top up the MotionSleeve before your first session:
- Connect the USB-C cable to the sensor pack’s charging port.
- Plug the other end into a standard USB power source. A wall adapter (5V, 1A or higher) charges fastest.
A full charge takes about 90 minutes from empty. While it charges, open Chrome on your computer so you’re ready to sign in (Step 3).
Step 2 — Put it on
Your MotionSleeve ships pre-configured for your prescribed joint — no setup needed. It wraps on like an ACE bandage, and attaches one of two ways depending on whether you’re rehabbing an upper or lower joint.
WARNING
Pain while putting it on
Putting on the sleeve shouldn’t be painful. If it is, stop and contact your care team — they’ll guide you on what’s normal during exercises.
Always contact your care team first if you have any questions about your rehab. For technical support with the sleeve or app, reach out to us at hello@openmotion.ai and we’ll help.
TIP
USB-C orientation
Wear the sleeve with the USB-C charging port facing outward — away from your skin, not pressed against your body. The port against your skin is uncomfortable and can cause improper sensor alignment.
For shoulder or elbow rehab (upper body)
Each velcro tab comes pre-routed through its rectangular D-ring, forming a closed loop you slide your injured arm through. The D-ring acts as a friction cinch — pull the loose end of the velcro through, wrap it back over itself until snug, then press it flat to secure.
- Lay the sleeve flat on the table, without attaching the velcro to the sleeve yet.
- Slide your injured arm through both loops.
- Lower the outside of your upper arm, near the middle of your tricep, onto the upper sensor pack — use your arm’s weight to hold the sensor against the table as you continue to cinch the wrap snug around your arm like an ACE wrap until secure, then press the velcro tab flat.
- Position the lower sensor pack on top of your lower arm, like a wristwatch — a few inches above where a watch would sit. Cinch the wrap snug around your arm like an ACE wrap until secure, then press the velcro tab flat.
If sliding your injured arm through the loops isn’t possible — limited range of motion, post-op restrictions — the velcro end of the sleeve can be routed around your arm and then back through the rectangular D-ring to attach, or you can wrap each compression wrap around your arm individually and secure with just the velcro, like a normal ACE bandage. You may want or require assistance.
For hip or knee rehab (lower body)
The compression wraps go around your injured leg like an ACE bandage — wrap them snug enough that the sensors don’t slide during rehab exercises and secure them in place with the velcro tab. Sitting down makes this easier.
- Sit down with your injured leg accessible.
- Hold the upper sensor pack against the outside of your thigh, about a hand’s width above the knee. Wrap the strap around your thigh and secure the velcro.
- Wrap the lower sensor pack into place on the outside of your lower leg, next to your calf.
- Make sure each wrap is snug enough that it stays put during movement.
The wraps should fit snugly to prevent the sensor pack from shifting during movement, but not tightly. They should not cut off your circulation or cause pain. You should still be able to slide a finger underneath the edge.
WARNING
If the fit isn't right
Please contact us or your care team and we’ll help get you back on track. If you can’t get set up or need a different sleeve, contact us and we’ll ship a replacement at no cost.
Step 3 — Open KineticOS and sign in
Open Google Chrome and go to app.openmotion.ai. Sign in with the email address your care team used to enroll you — the page will guide you through any verification steps.
You’ll land on your home screen: your prescribed protocol and its activities, a Connect Sleeve button at the top, View My Data, and Start Session.

Step 4 — Start a session
Click Start Session. KineticOS asks whether you want to connect your MotionSleeve.
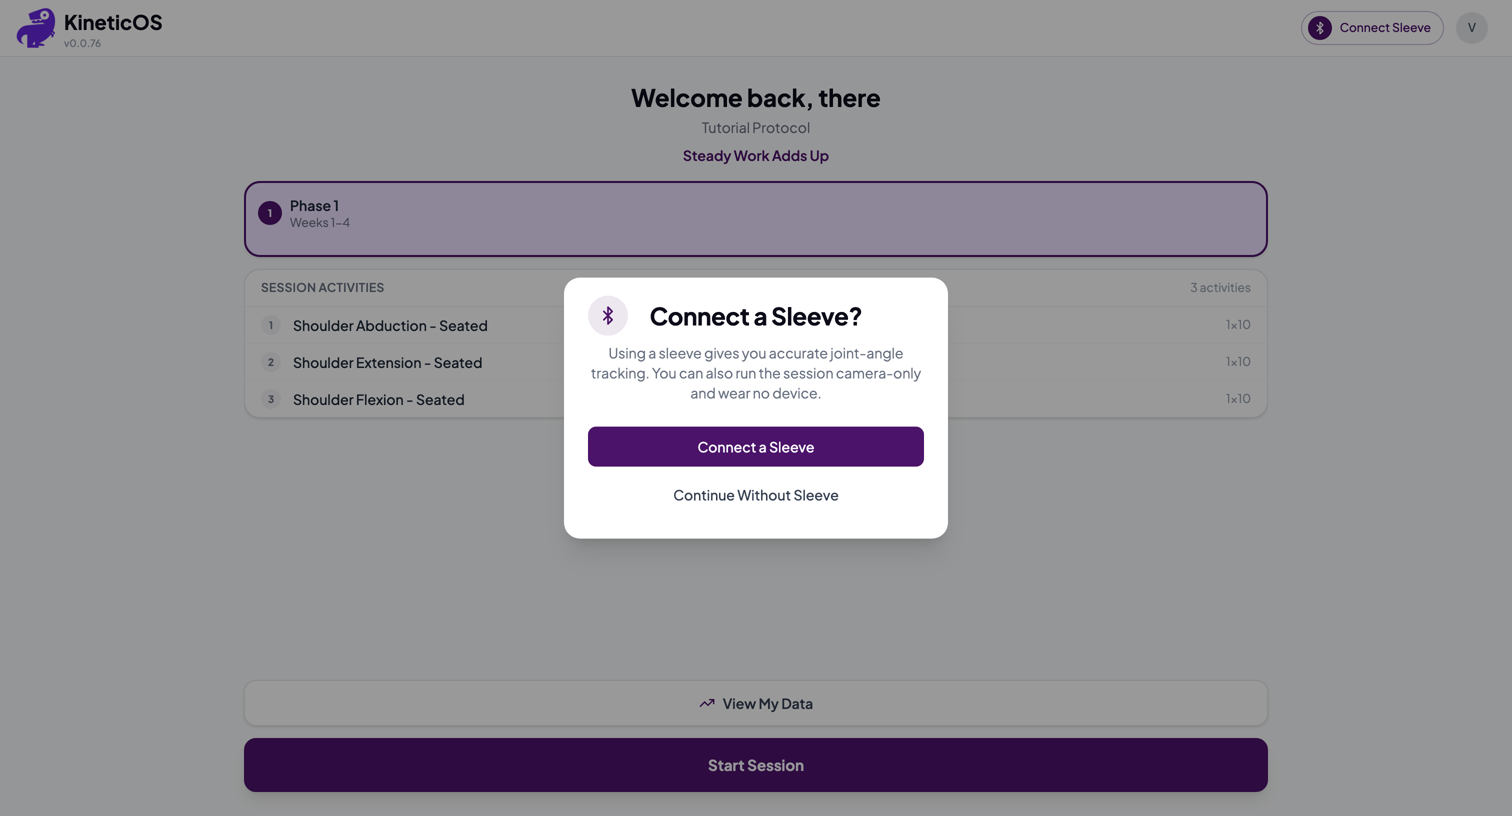
- Connect a Sleeve gives you accurate joint-angle tracking — follow the steps below.
- Continue Without Sleeve still guides you through each exercise, but with no sleeve there’s no movement tracking, no on-screen feedback, and nothing recorded for your care team.
TIP
Use your sleeve whenever you can
The MotionSleeve is what measures your range of motion and sends your progress to your care team. Only continue without it if your sleeve is charging or unavailable — and connect it as soon as you can.
Connecting a sleeve
-
Click Connect a Sleeve. Chrome shows a Bluetooth chooser listing nearby sleeves — yours appears as BGX____. Select it and click Pair. The Connect button shows the progress, turning green with your device once it’s streaming.
 Screenshot pending Connect button — idle, connecting, connected
 -
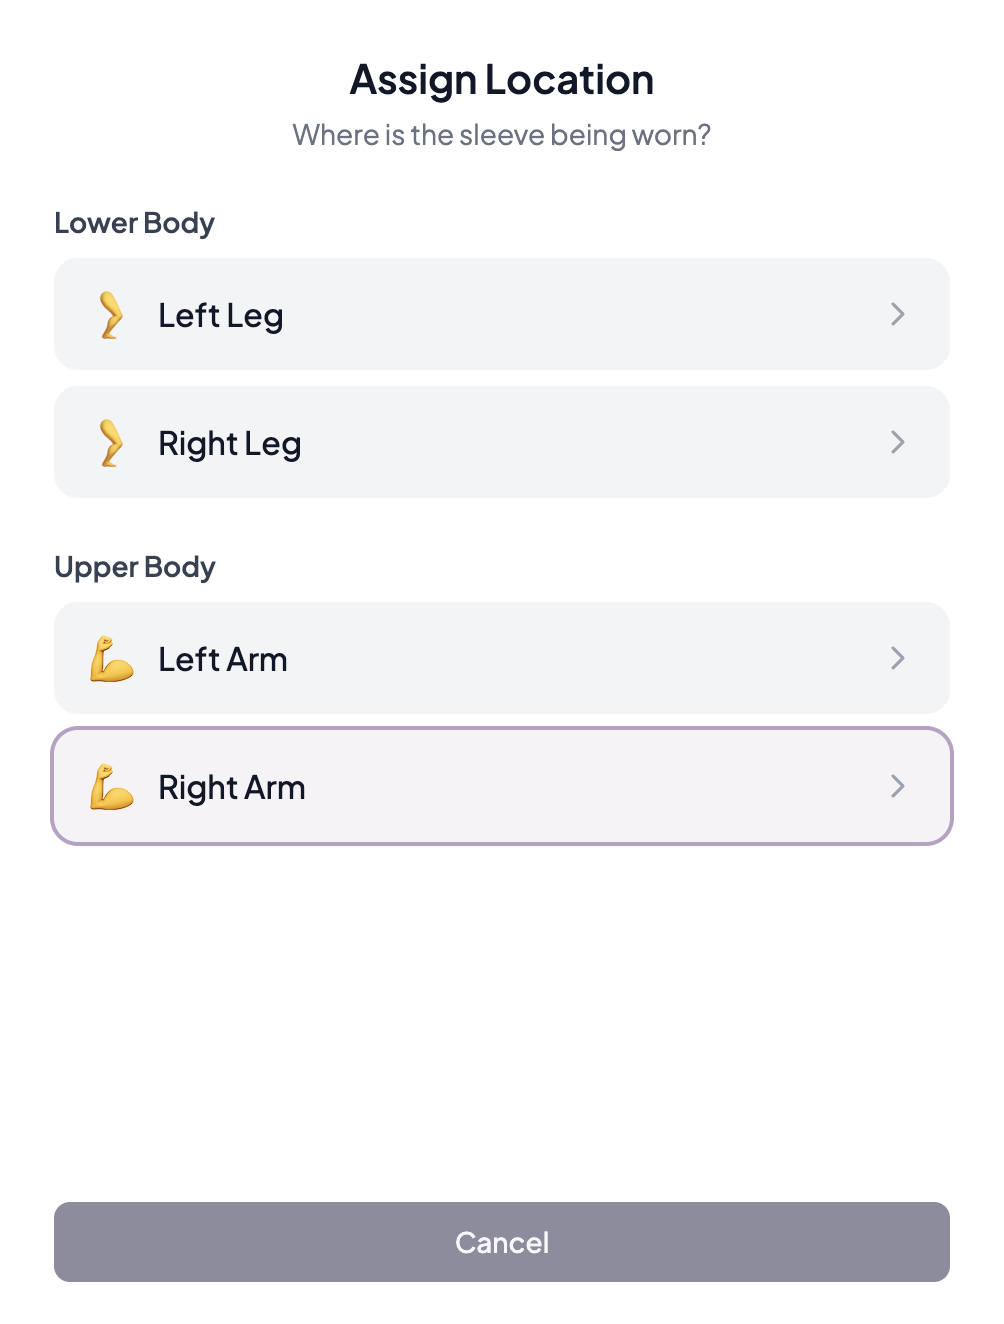
Assign Location — tell the app where the sleeve is worn (Left or Right Arm, Left or Right Leg).
 Screenshot pending Assign Location — where the sleeve is worn
 -
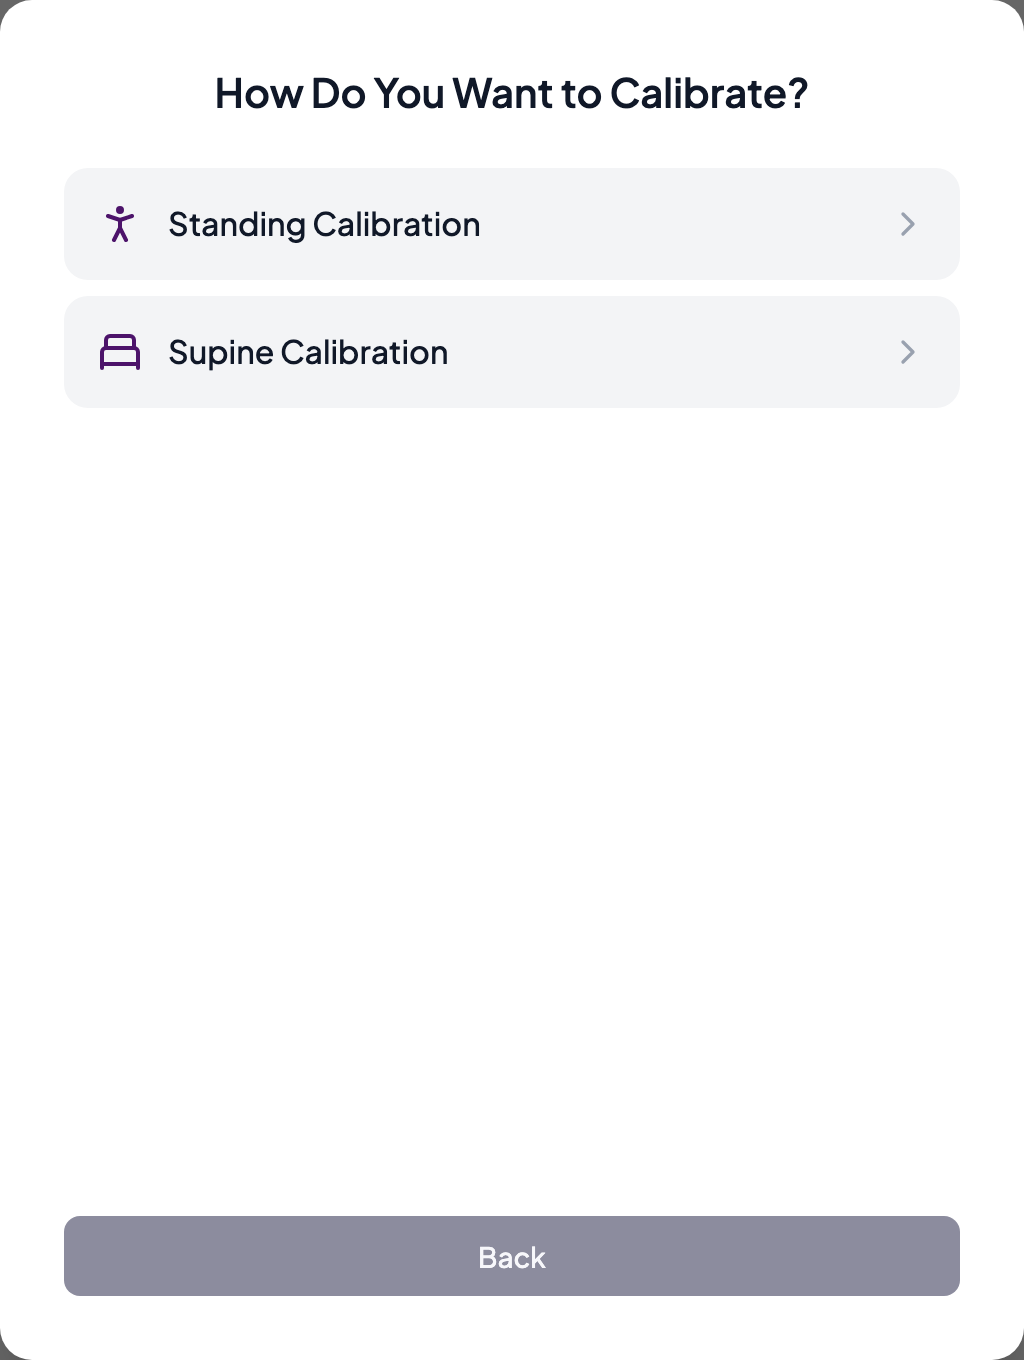
Calibrate — the app then walks you through a short calibration so the on-screen avatar mirrors your limb. For a leg sleeve, choose Standing or Supine; an arm sleeve calibrates in a single pose.
 Screenshot pending Leg sleeve — choose Standing or Supine
Follow the on-screen poses, holding each one for about 5 seconds. When you’re finished you’ll see Calibration Complete.
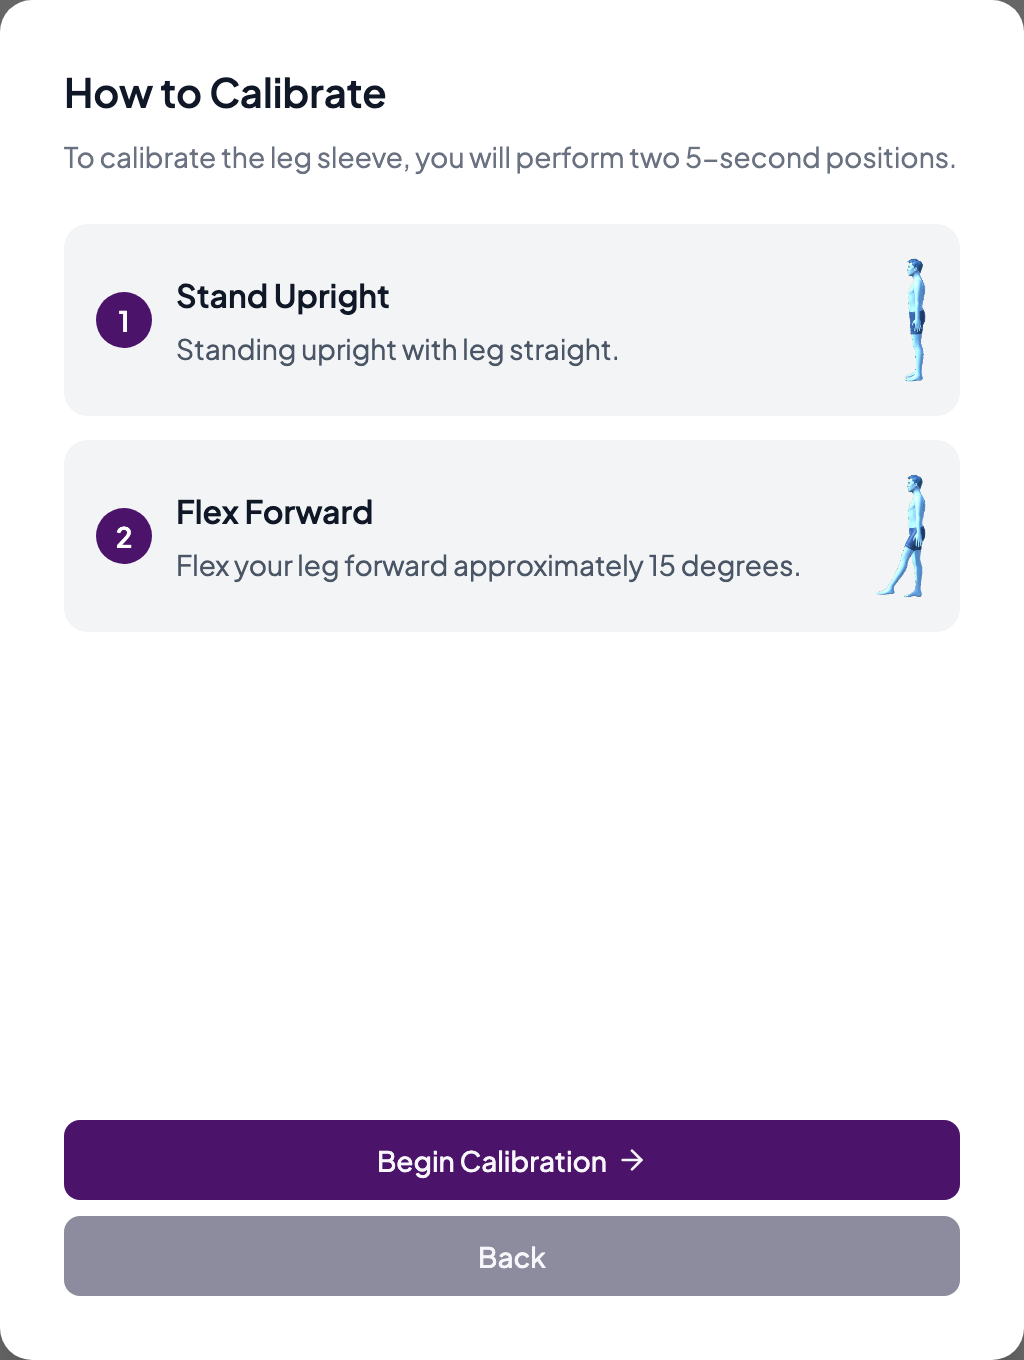 Screenshot pending Hold each pose for about 5 seconds
You can recalibrate any time from Device Details (the green Connect button).
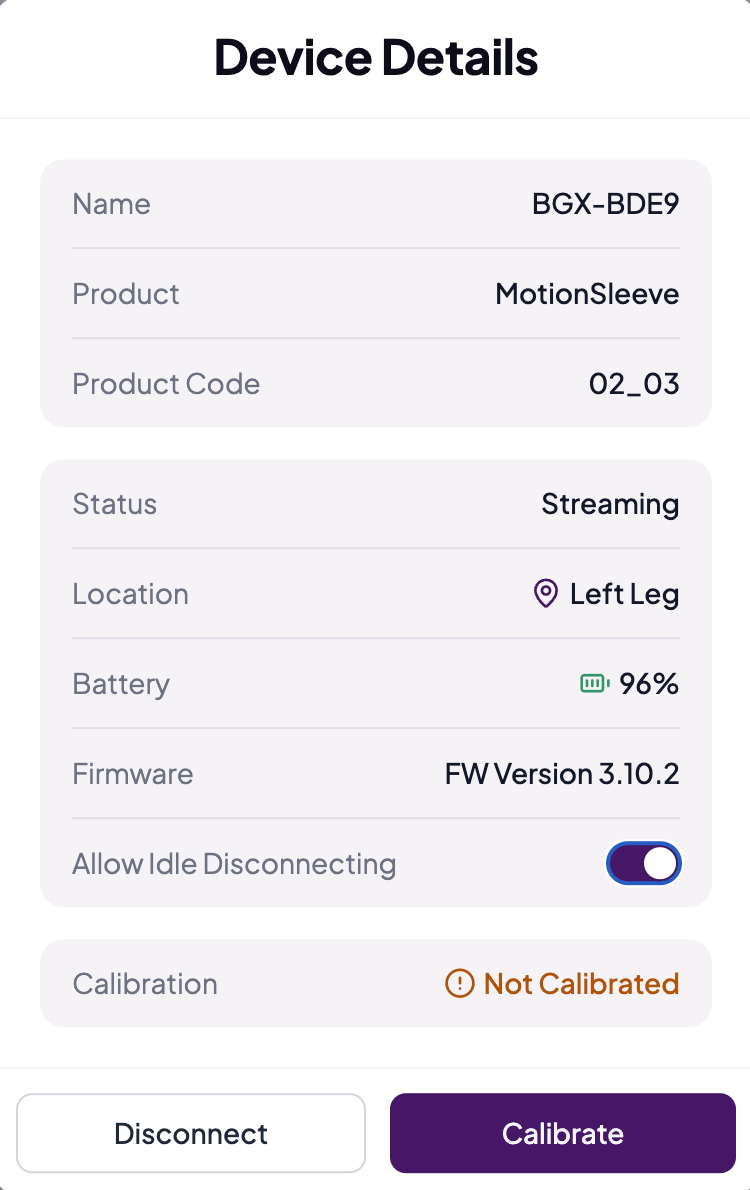 Screenshot pending Recalibrate from Device Details
Step 5 — Do each activity
The session walks you through each prescribed activity.
-
Get into position — the app shows the starting position and a demo video. When you’re set, click I’m Ready.
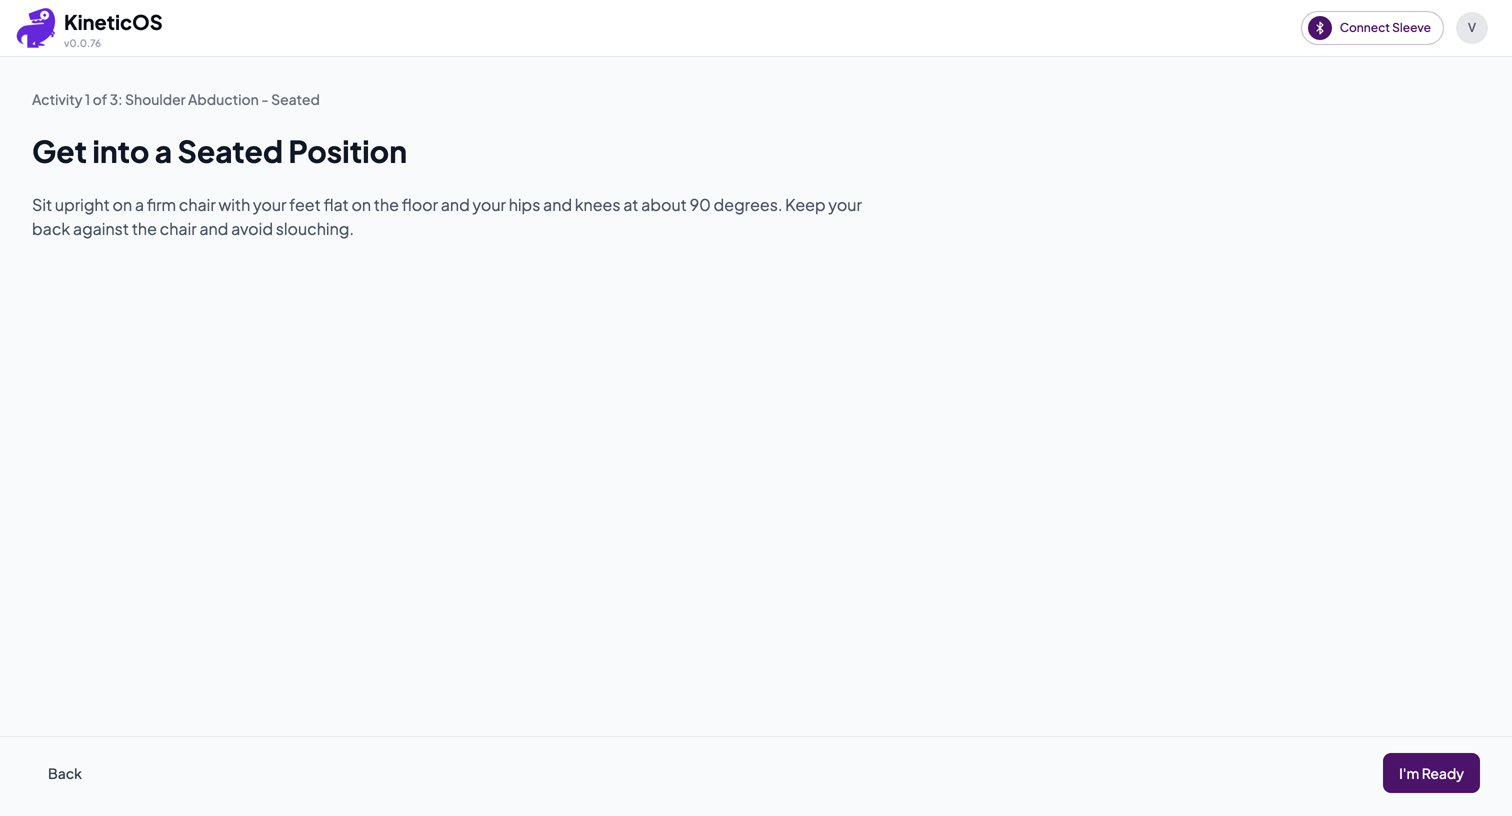 Screenshot pending Position prep — get set, then I'm Ready
 -
Perform the activity — a short countdown gets you ready, then the avatar mirrors your movement, the dial shows your peak angle against the target, and your reps count automatically. Click Complete Activity when you’ve finished the set.
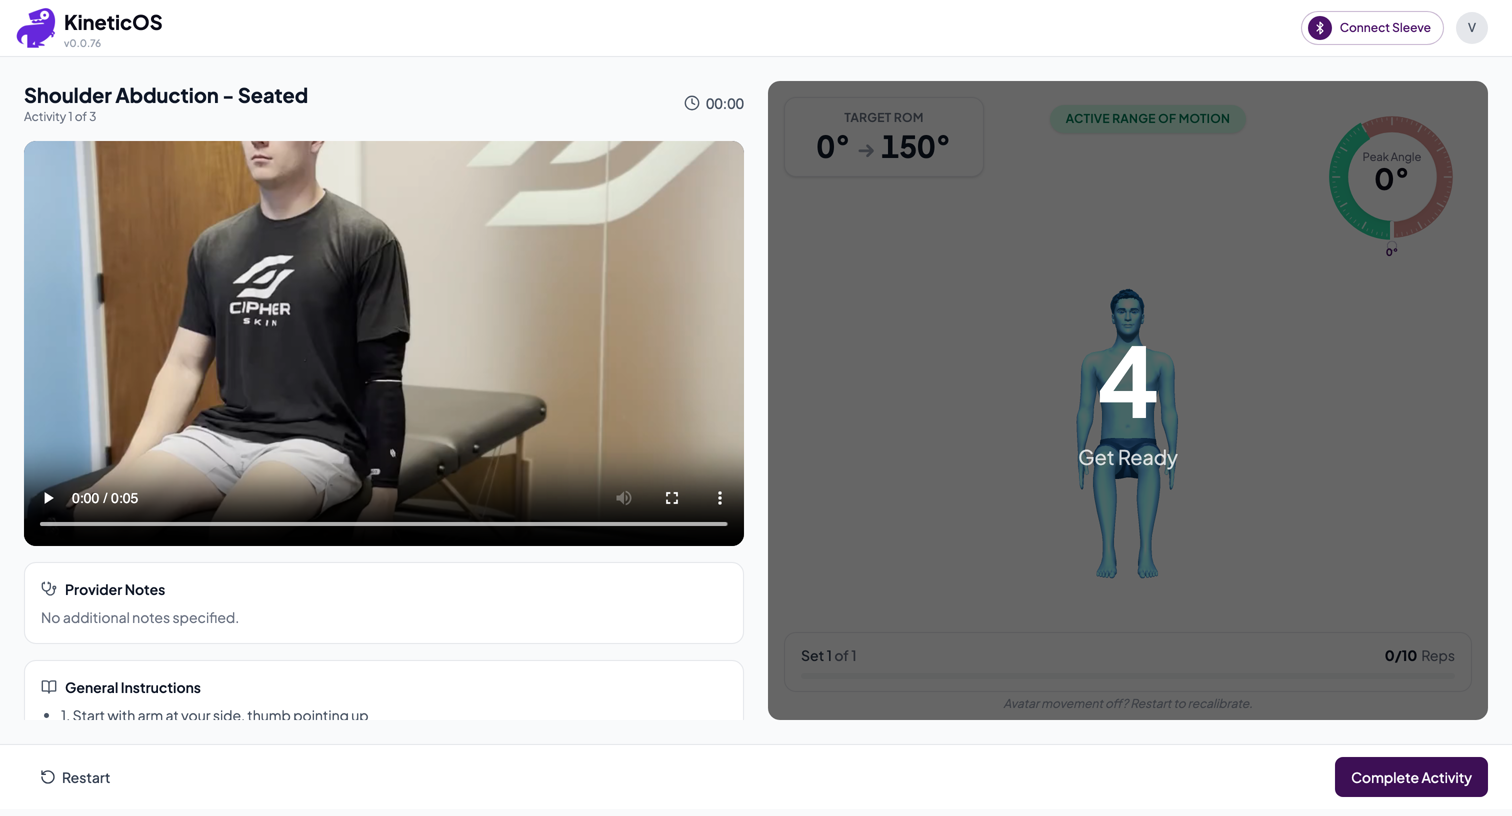 Screenshot pending Perform — avatar, peak-angle dial, rep count
 -
Activity summary — add any notes for your care team and click Continue to move to the next activity.
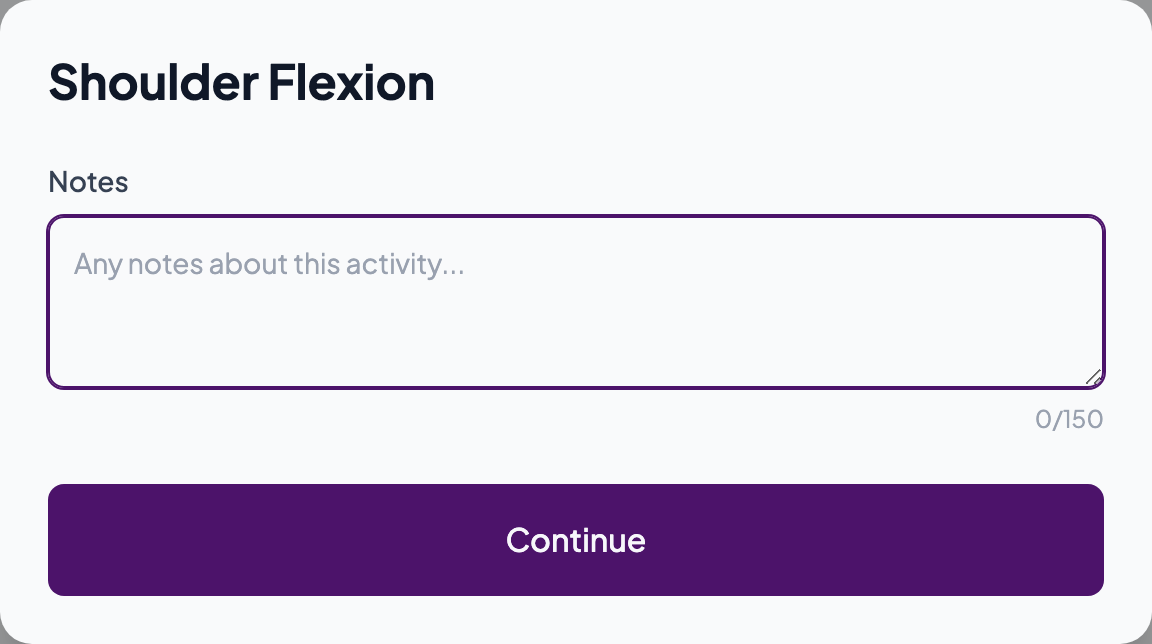 Screenshot pending Activity summary — notes, then Continue
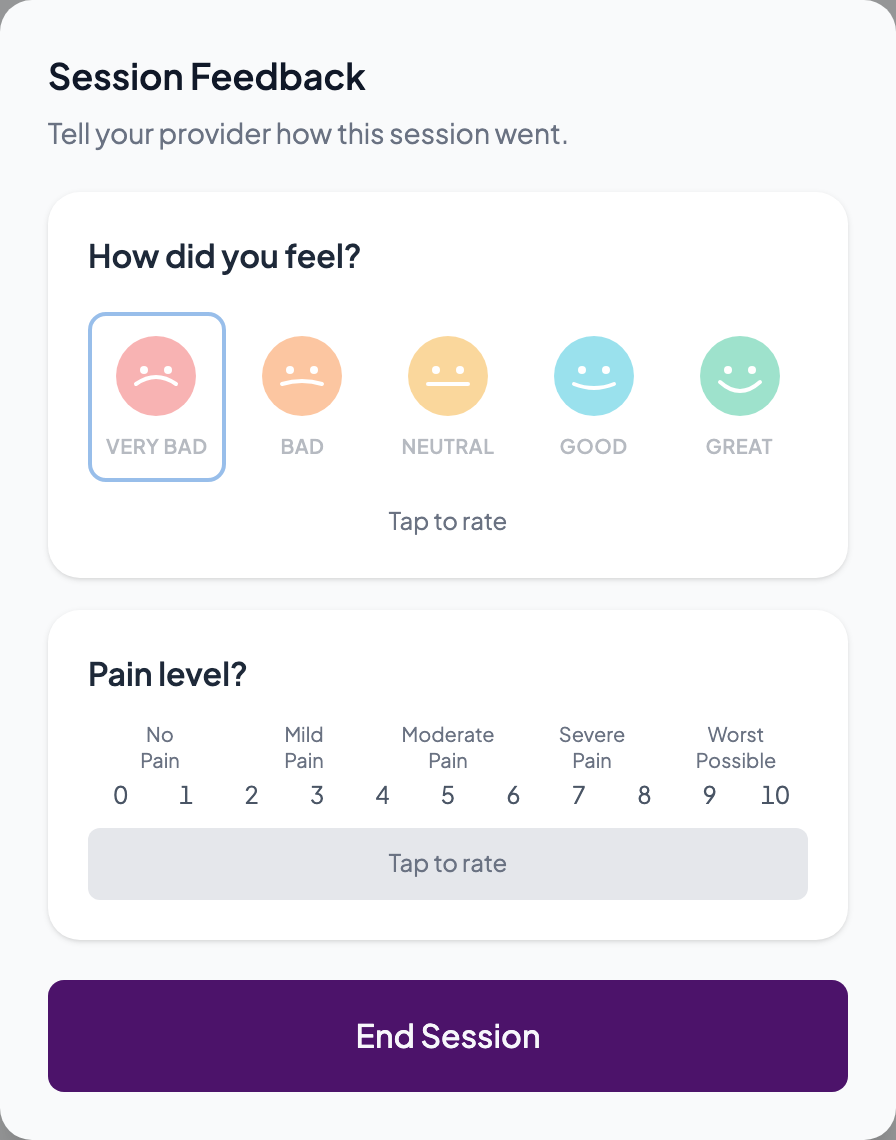
Step 6 — Finish and rate your session
After the last activity, click Finish. Then tell your care team how it went: How did you feel? and Pain level. Click End Session when you’re done — that’s it.
SUCCESS
You're done
Your care team sees each session’s data — and any notes you leave — in their dashboard, and adjusts your program based on what they see. If something needs attention, they’ll reach out.
What to do if something goes wrong
- Chrome doesn’t show the device chooser, or no sleeve listed: make sure you’re in Google Chrome — no other browser will connect — and that your computer’s Bluetooth is on and the MotionSleeve is charged. Move the sleeve closer and give it a gentle shake to wake it, then try Connect a Sleeve again.
- It sees the device but fails to connect: the sleeve’s battery is probably low. Plug it in to charge, then try again.
- No sleeve handy? You can still be guided through the exercises with Continue Without Sleeve, but nothing is tracked or sent to your care team — connect your sleeve as soon as you can.
- Anything else: see the full troubleshooting guide.