Getting Started - For Providers
A tour of the KineticOS clinician web app — your patient dashboard, adding patients, reviewing sessions, building protocols, assigning them, and managing your roster.
This guide tours the KineticOS clinician web app — signing in, reading your patient dashboard, adding patients, reviewing sessions, building and assigning protocols, and keeping your roster tidy. For technical help, email us at hello@openmotion.ai.
NOTE
Before you start
The clinician web app runs in Google Chrome (latest stable version). You’ll need the welcome email your program administrator sent you. The left rail has three sections — Patients, Treatment, and Notes — used throughout this guide.
Step 1 — Sign in and your dashboard
Open Google Chrome, go to app.openmotion.ai, and sign in with your work email.
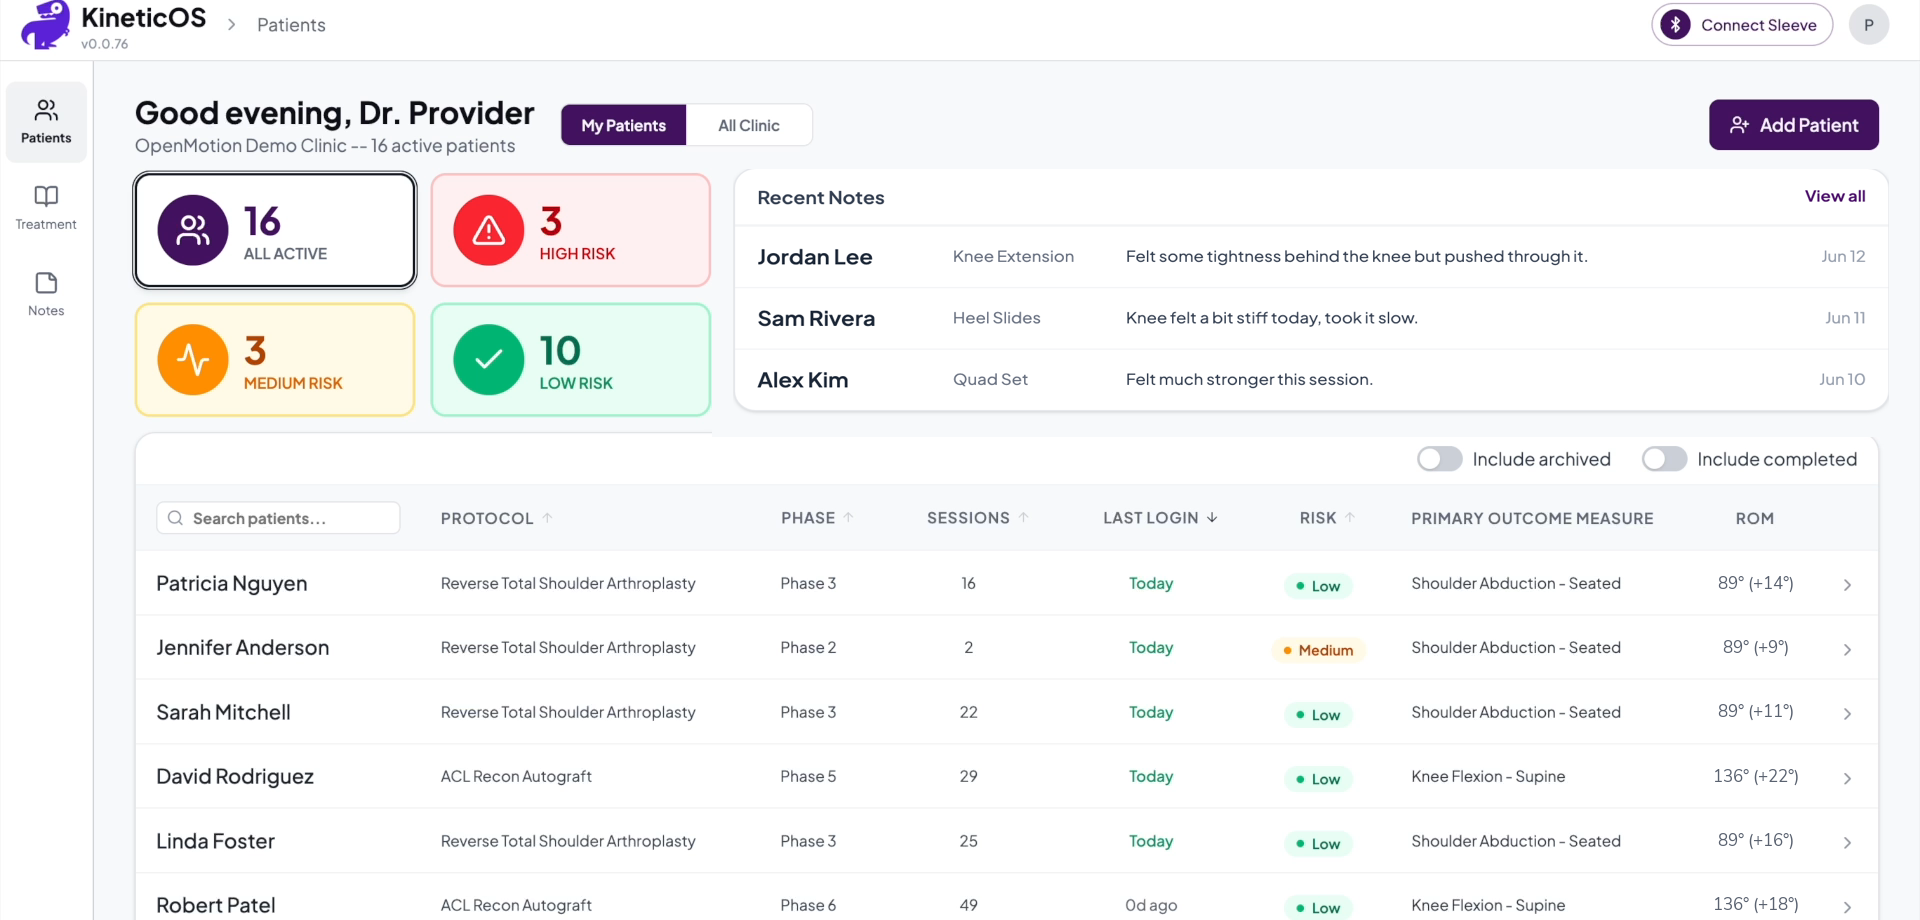
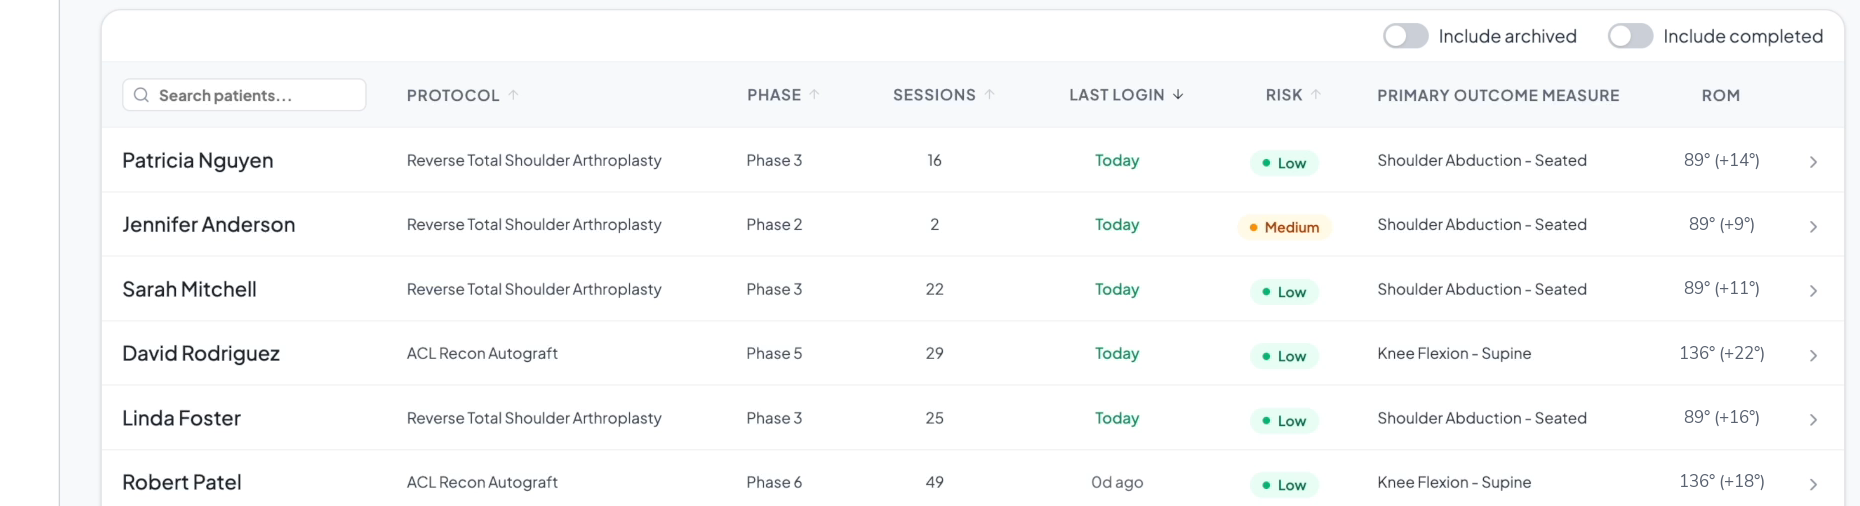
You land on Patients — your dashboard. The tiles across the top break your panel down by risk (All Active, High Risk, Medium Risk, Low Risk), Recent Notes shows the latest activity, and the table lists every patient with their protocol, phase, sessions, last login, risk, primary outcome measure, and current ROM.
Step 2 — Add a patient
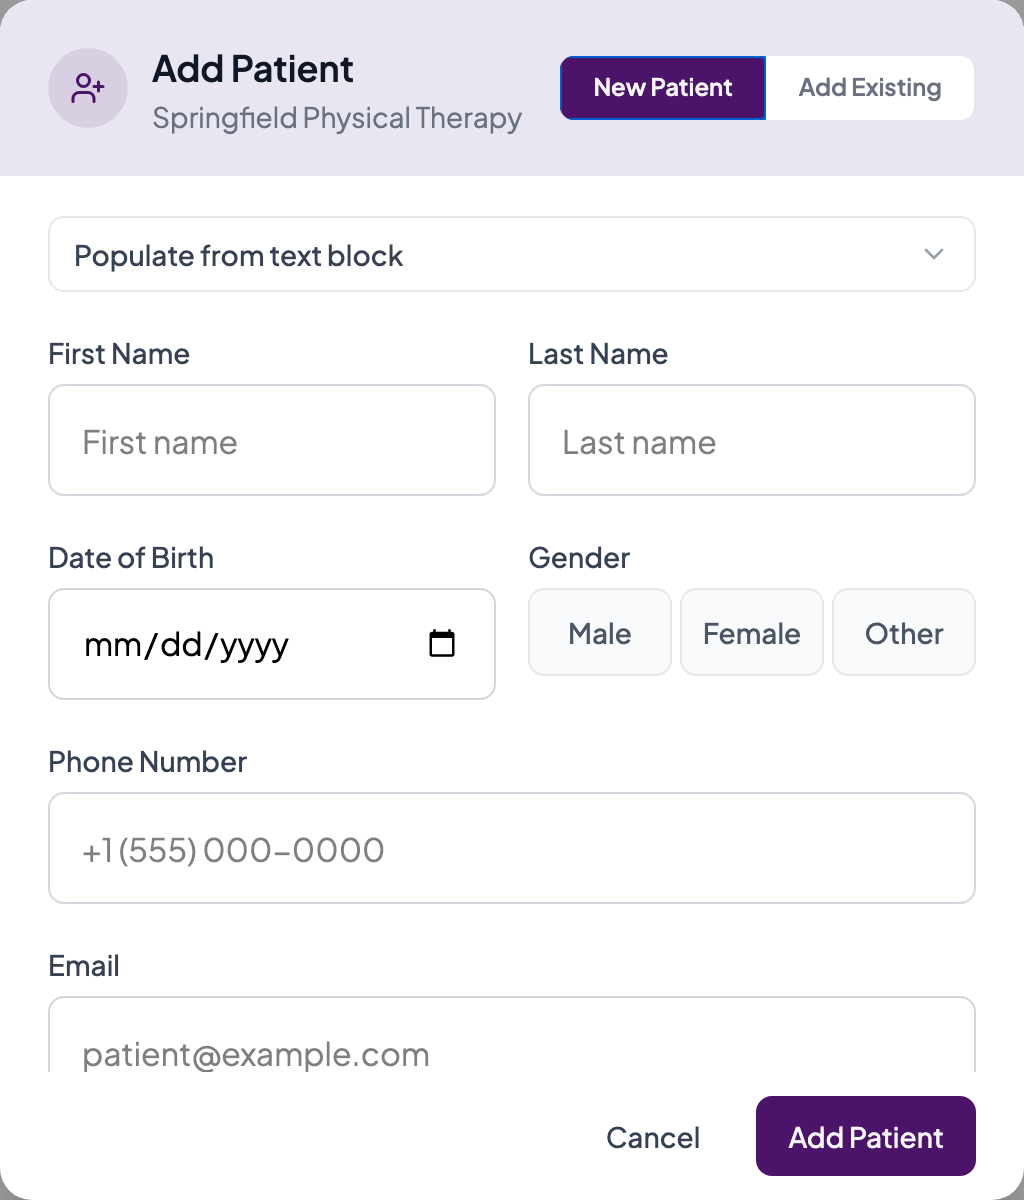
Click Add Patient (top right of the dashboard). The dialog has two tabs.
New Patient creates a brand-new record — enter first and last name, date of birth, gender, phone, and email, then click Add Patient. (You can also paste details with Populate from text block.)
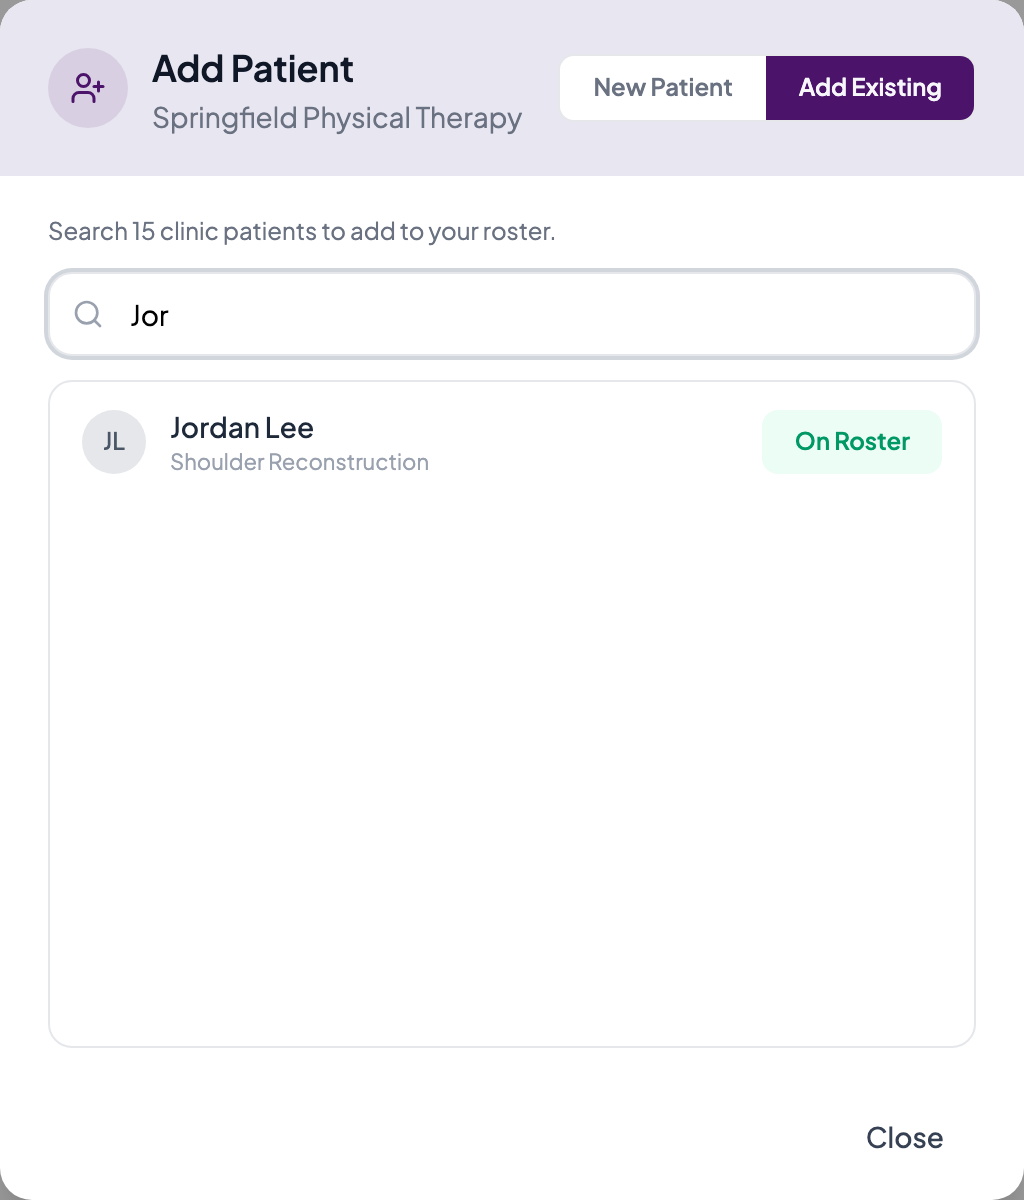
Add Existing pulls a patient who’s already in your clinic onto your roster — search by name and add them.
NOTE
The patient gets a welcome email
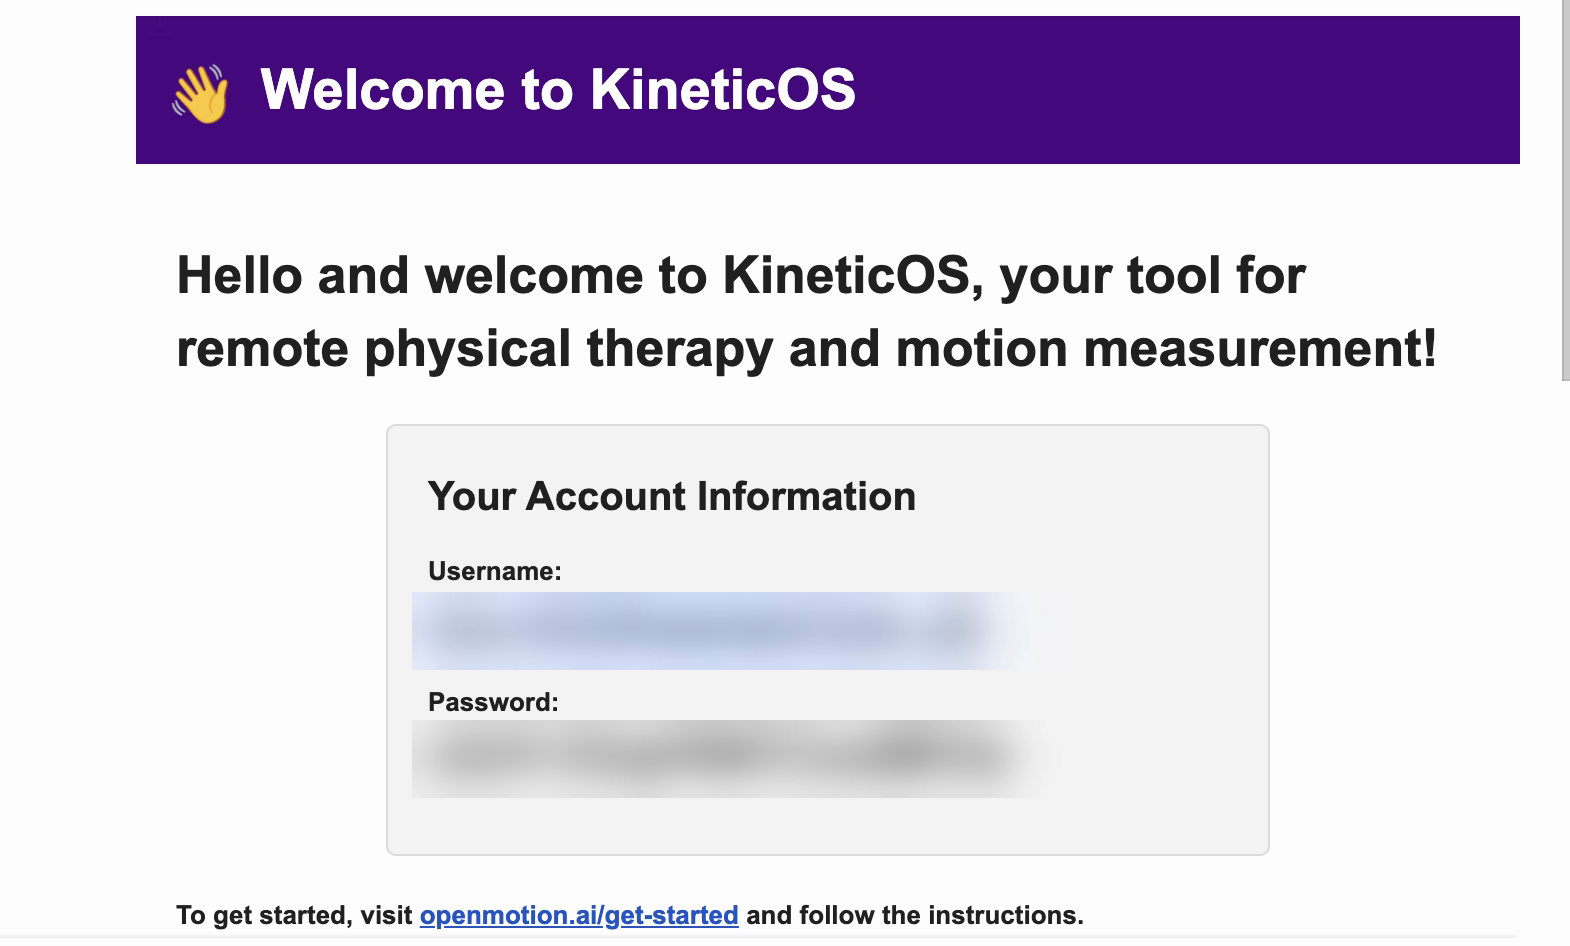
When you add a new patient, KineticOS emails them a Welcome to KineticOS message with their username and a temporary password, and a link to the get-started guide. They use it to sign in to the patient app for the first time.
Step 3 — Open a patient record
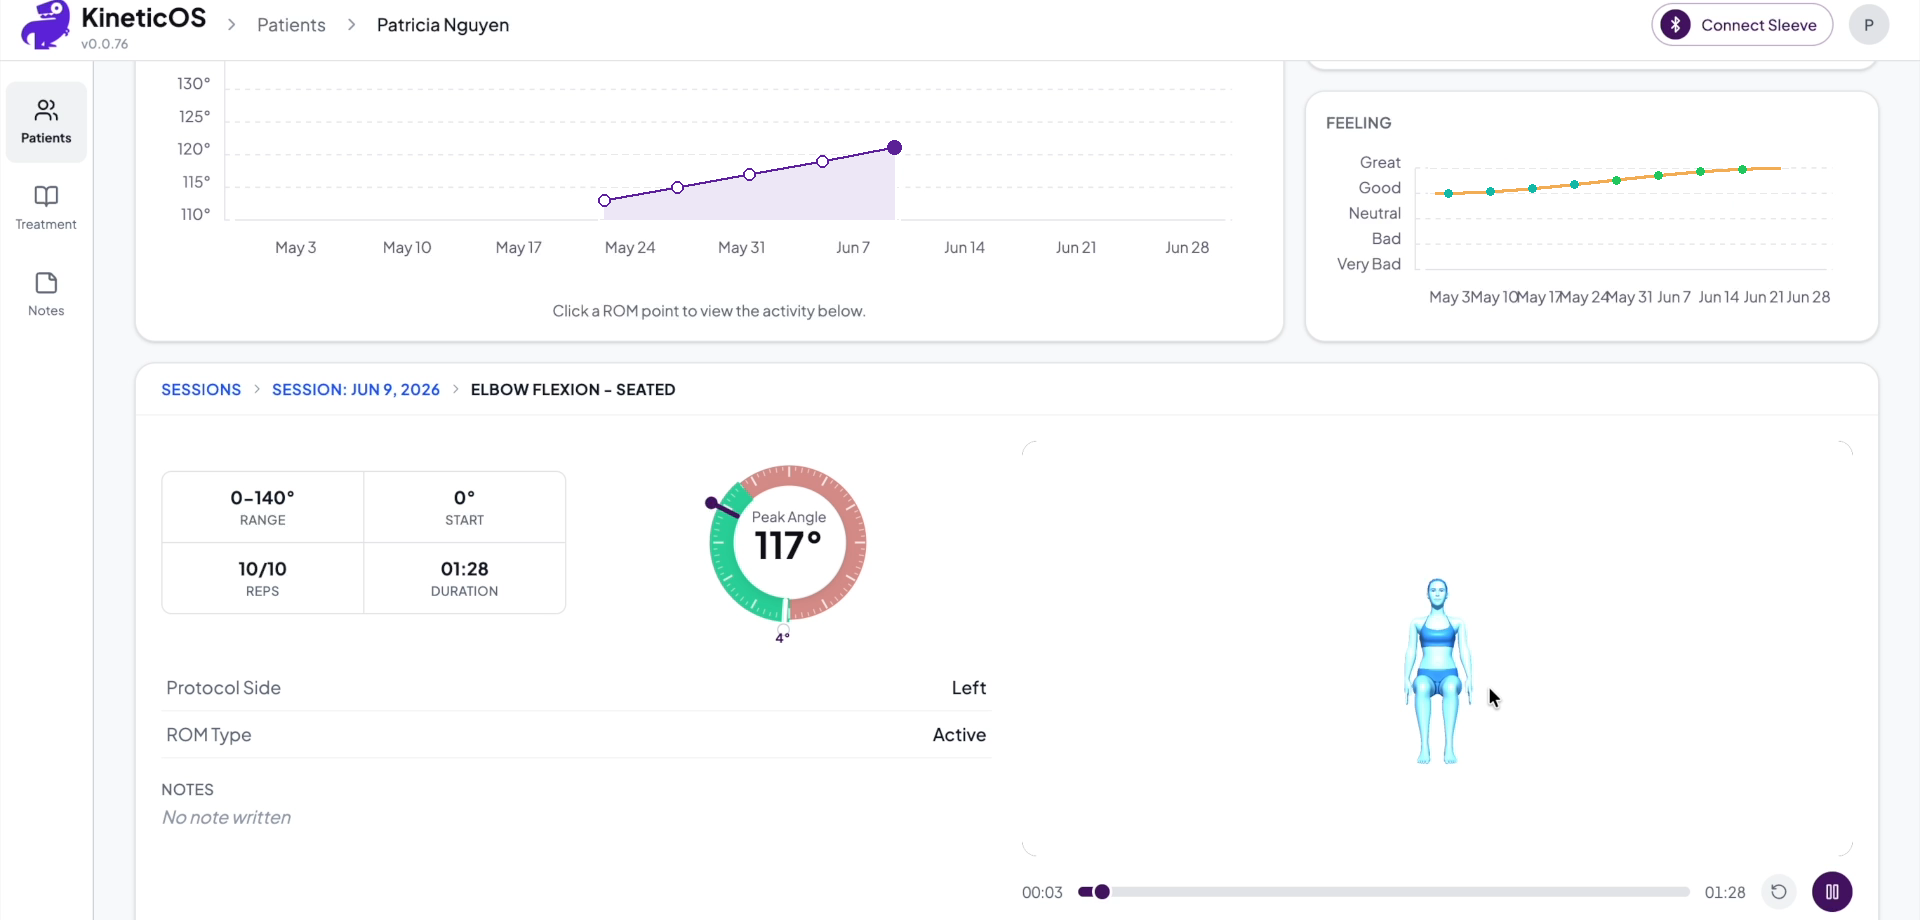
Click any patient row to open their record. At the top you’ll see their ROM trend over the episode and a Feeling chart from their post-session check-ins (Great to Very Bad). Below, each activity in each session can be replayed: the goniometer showing peak angle against the target, the avatar, and the range, start angle, reps, and duration for every activity. Click a point on the ROM chart to jump to that session.
Step 4 — Review patient notes
After finishing an activity, a patient can leave a note for you — how it felt, a question, anything worth flagging. Their notes surface in two places: the Recent Notes card on your dashboard (top right, with View all), and the dedicated Notes page in the left rail, which lists notes across your roster with the activity, its ROM range, and the date. Filter by My Patients or All Clinic.
Click a note to jump straight into that activity’s detail view, where you can replay the recording — the same goniometer and avatar you see in the patient record.

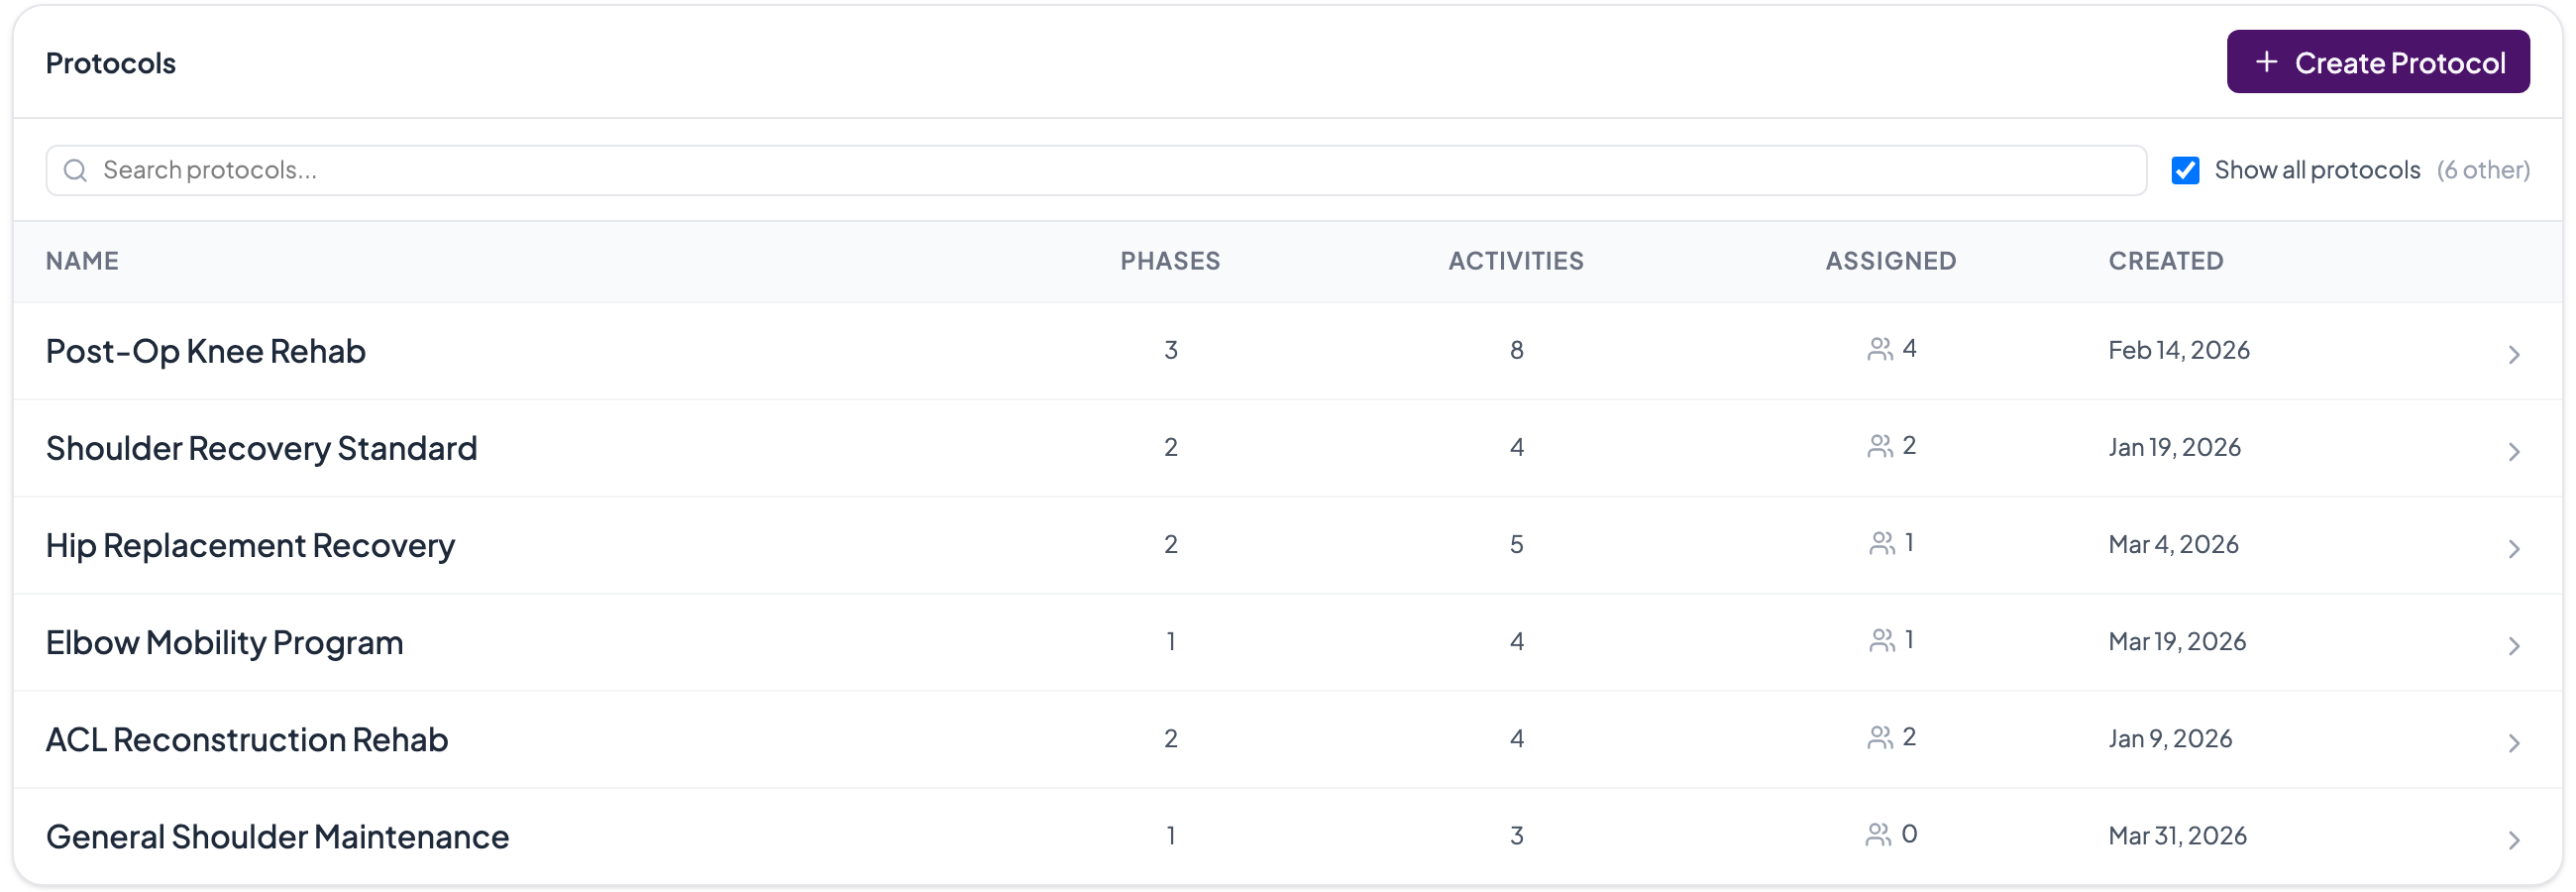
Step 5 — Browse the protocol library
Under Treatment, your protocol library lists the programs you assign to patients. Each protocol shows its number of phases and activities, how many patients it’s currently assigned to, and when it was created. Open one to review or edit it, use Create Protocol to start a new one, or copy an existing protocol as a starting point.
Step 6 — Build a protocol
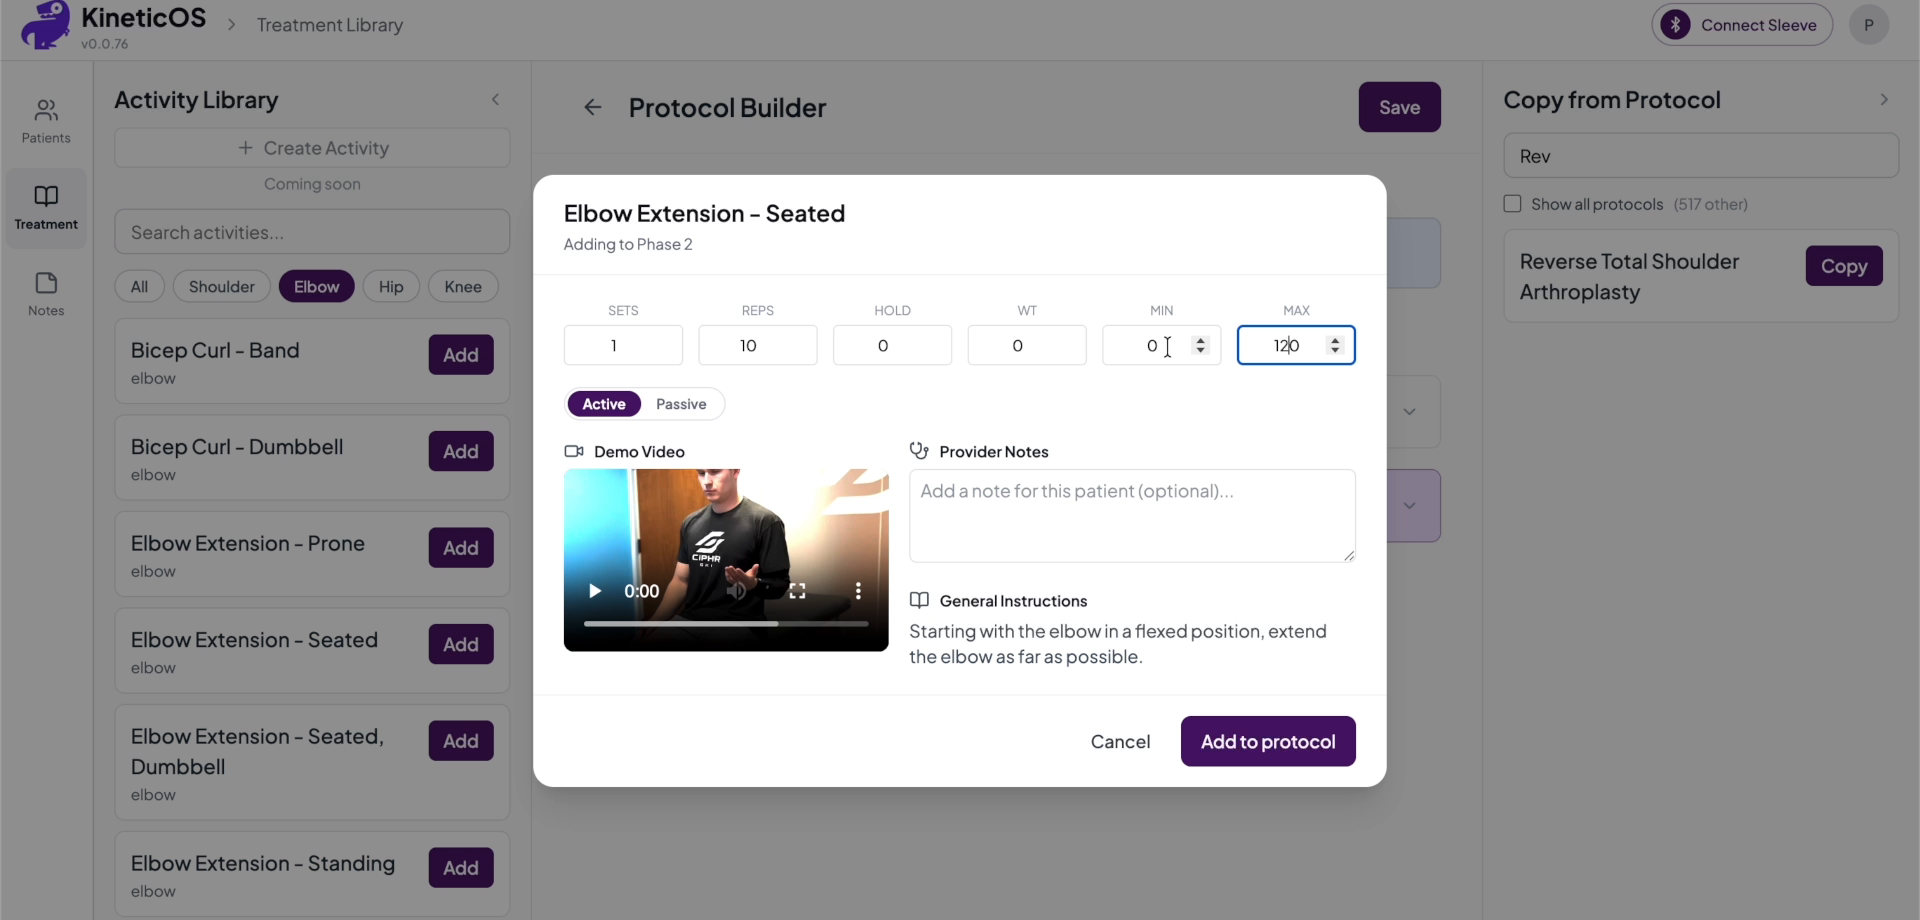
In the Protocol Builder, assemble a protocol from the Activity Library on the left. For each activity you add, set the sets, reps, target ROM, and whether it’s active or passive, and add provider notes the patient sees during their session. Most activities come with a demo video we’ve recorded for the patient, which you can review here — and we can add demo videos or new activities on request. Copy from Protocol starts from an existing protocol.
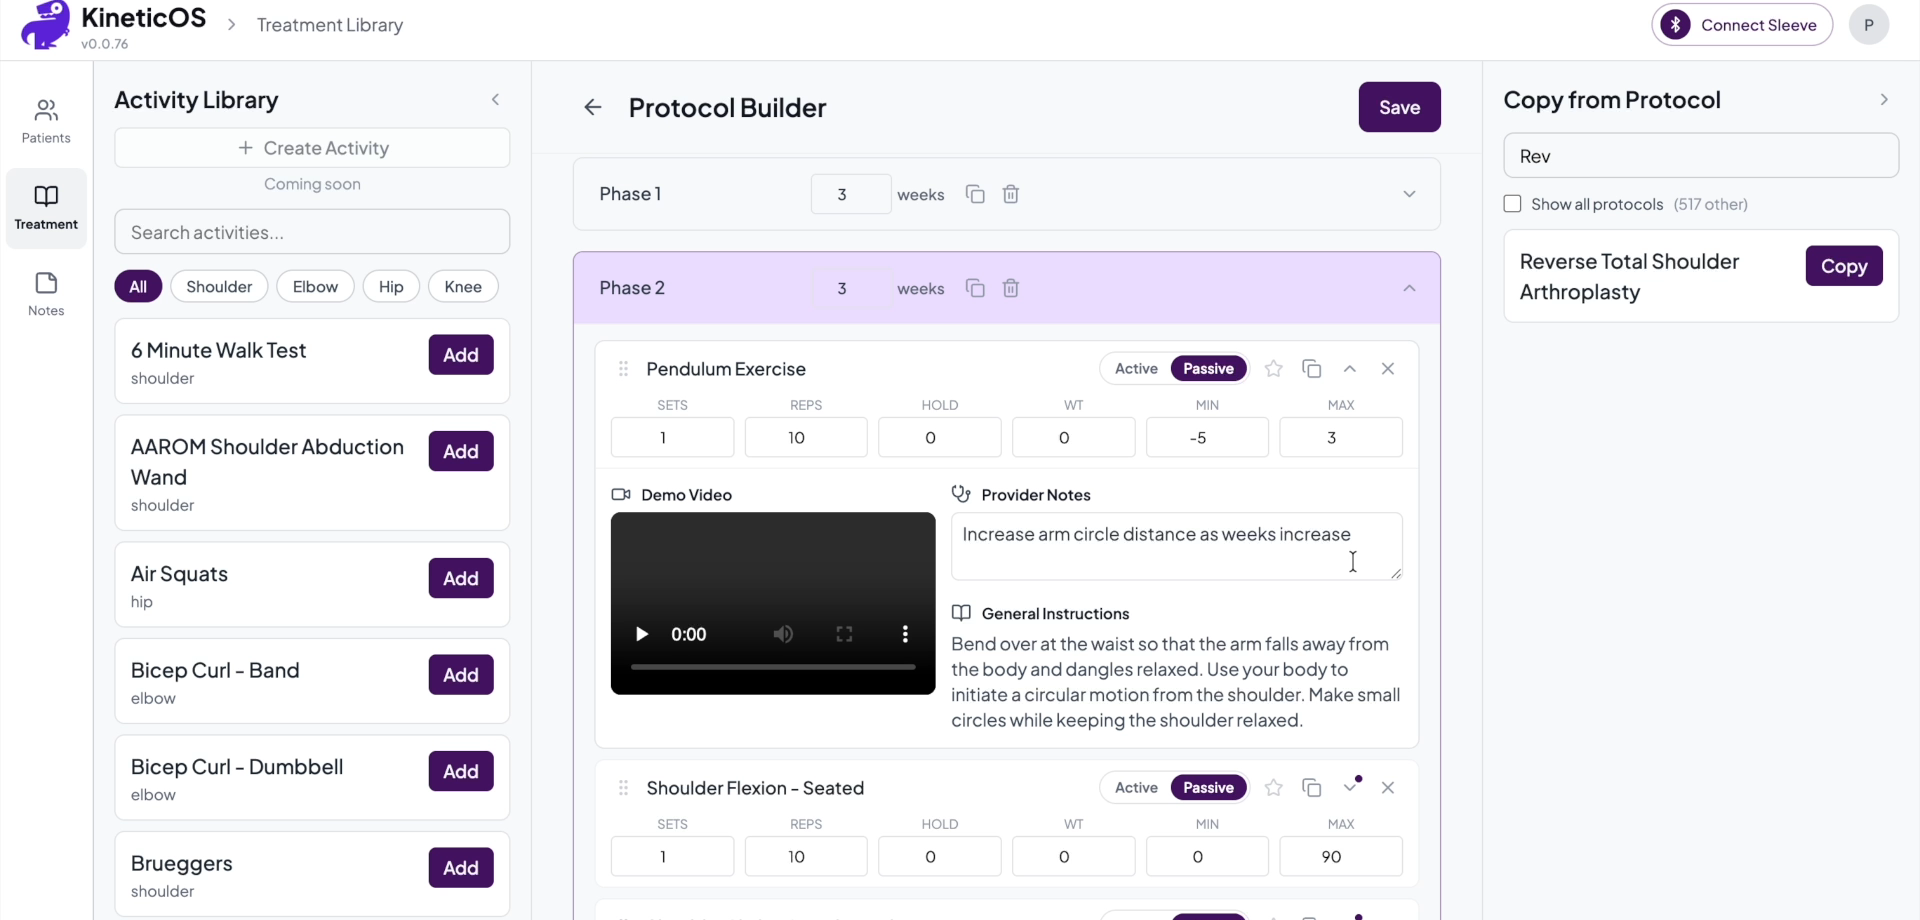
Click an activity to configure its details — sets, reps, ROM target, active vs. passive, and provider notes, alongside the demo video we provide for it.
Step 7 — Assign a protocol
There are two ways to assign.
From the protocol — open a protocol and use the Assign Protocol panel on the right: pick the patient, set a Start Date, and click Assign. The panel also lists who’s Currently Assigned, each with an Unassign control.

From the patient — open the patient and use their assign control to pick a protocol and start date. If they already have one, you can swap it. This opens the same assign dialog, pre-filled with the patient.
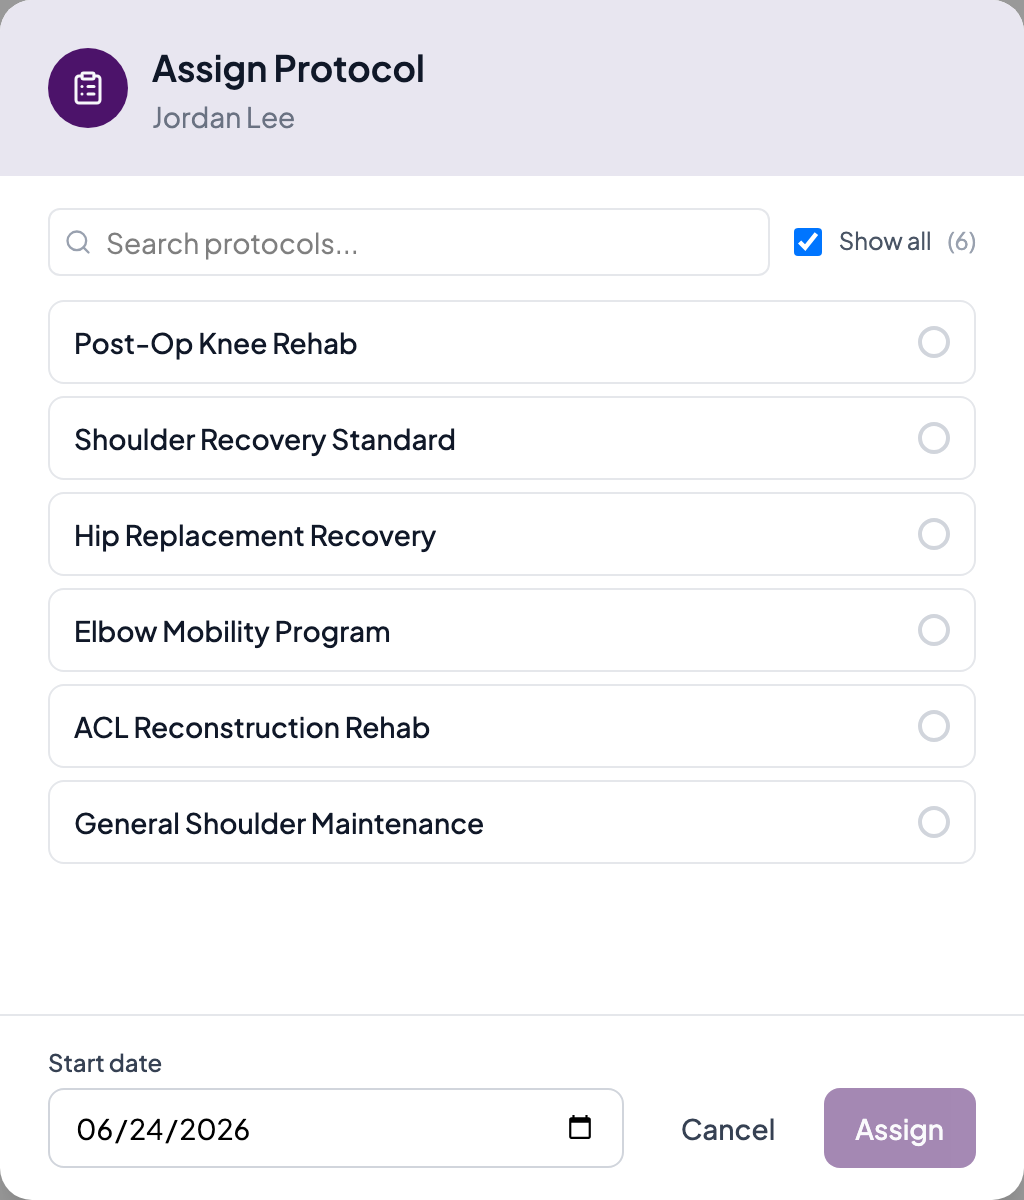
Once assigned, the protocol appears in the patient’s app and their sessions start flowing back to the dashboard in Step 3.
Step 8 — Archive or mark a patient complete
When a patient finishes their episode of care, mark them completed; to hide someone without deleting their data, archive them. Both keep their history intact and remove them from your active panel. Use the Include completed and Include archived toggles above the table to show them again.
SUCCESS
That's the loop
Add a patient, build and assign a protocol, review each session and PROMs as the data comes in, and complete or archive patients as they finish. For questions about the app or your account, contact us.